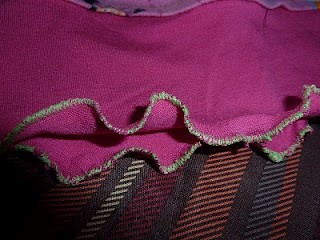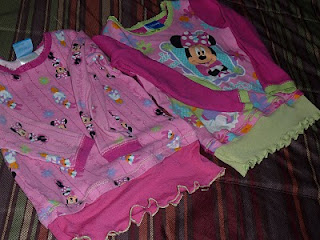
Thanks to No time to be bored for this money saving idea. It made me smile because this is SO something my own Mom would have made. My kids pajama tops are always to short so I LOVE this idea.
Extending the life of clothes – making tops longer
By ~ No time to be bored
I think most moms recognize how fast kids outgrow their cute clothes. I found a way of making tops last longer, using some old t-shirts from myself that were on my ‘donation’ pile. It’s really fast and easy, I added this extra layer to these 2 pajama tops in about 15 minutes! So why not give this a try?
This would also work for boys’ clothes, with one little adjusment. I will give a step-by-step tutorial, I didn’t take pictures of the separate steps, but it’s so simple that you don’t really need the pictures to go with this.
1. Take the top that got too short, and find a t-shirt in a matching or contrasting color. For most clothes, even a simple white t-shirt would create a cute, layered look.
2. Cut off the bottom part of the t-shirt, about 1 inch longer than you want the bottom layer to finally be.
3. Flip the part you just cut off inside out. Measure how wide your kid’s top is. Zigzag the side of the part you cut off (inside out) so that it has the same width.
4. Then, trim off the excess fabric. Next, stitch on the inside of your zigzag with a straight stitch.
5. Now there are 2 different ways to proceed, depending if you want a ruffly bottom (like pictured) or just a simple, straight bottom.
For the ruffly bottom: Zigzag the raw edge of the “tube” you created with a small zigzag stitch. It will end up curly looking like the pictures above. Then, pin the tube with the finished edge underneath the bottom of the shirt, and attach with a straight stitch. (I just followed the seams that were already there to make it look neater. So you might want to do that twice if there where 2 originally.)
For a straight bottom: pin the raw edge of the “tube” you created underneath the shirt. Attach with a straight stitch. (I just followed the seams that were already there to make it look neater. So you might want to do that twice if there were 2 originally.)
And that’s it!
This would be even quicker if you would use a shirt that is of the same width, so basically combine 2 outgrown shirts. That way steps 3 and 4 could be skipped.

—– > http://bit.ly/19XIyPA