First I just wanted to say a HUGE THANK YOU to everyone who took the time to submit your Thrifty Halloween tips. We really enjoyed hearing from our readers and wish we could give you ALL a $25 gift card….. But since I am A Thrifty Mom, not Oprah that is not going to happen. We each picked our favorite tip and asked a few friends to also select their favorite. We came up with our TOP 5, You will now get to pick the winner ( the person with the most votes will win a $25 visa gift card). One vote per person, simply leave a comment letting us know which one is your favorite!
Tip #1
Thanks to Streatching your Dollar$ Idaho for todays thrifty tip,
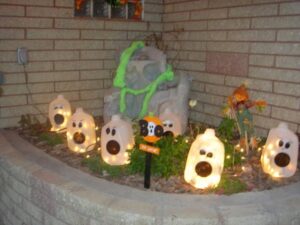 Milk Jug Ghost Lights (A few years ago we made Milk Jug Ghost Lights. Here is how we did it…) attached is a pic. of when we did our Jug Lights a few years ago
-First you want to save 5-10 milk jugs (however many you will use) rinse them out and dry them
-Once they are dry use black permanent marker to make scary faces on the front
-Cut a small hole in the back of the milk jug
-Lay them outside or in your windows and put a string of Christmas lights in the holes you cut in the back of the jugs and you have cute Ghost Milk Jug Lights
(Total cost will be FREE if you save your milk jugs and use a strand of lights you have at home, if not you can pick up a strand at the dollar store)
Tip #2
Thanks to Kimberly D for todays tip
So my husband came up with this really thrifty, really cool Halloween decoration. He bought an orange table cloth and some black poster board, the table cloth was $1.50 at Wal-mart and we already had the poster board. We cut the eyes, mouth and nose out of the poster board and taped it to the window like a jack-o-lantern face and then hung up the orange behind it, so when our lights are on we have a huge glow in the dark pumpkin in our window.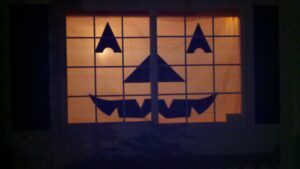
Tip #3
Todays Thrifty tip is from Andrea,
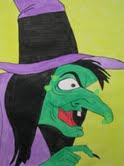
One year for a Halloween party, a favorite game we made and played was “Pin the wart on the witch.” All you need is a poster board (if you took advantage of the cheap poster boards on sale at WalGreens over the summer <.29 cents>, you should have a few), some paint or crayons or markers, tape, and a creative hand. Here is our pin the wart on the witch board game. You can see how the kids did with their wart pinning. Thrifty and fun.
Tip #4
Thanks to Kristy L. for this thrifty tip,
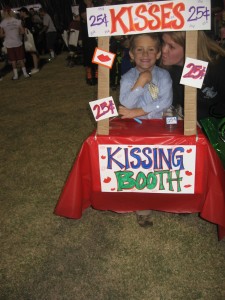 Here is a costume that I made for my son. It was totally free! (I had everything you see laying around my house and garage!) It was super easy to make too! I used a box and threw a plastic table cloth over it. I used cardboard from another box to make the top pillars and attached cardboard to the top for the “sign”. I just used a belt to secure it onto his waist. I dressed him up in his Sunday clothes and I taped a plastic cup for all the money that he would make! It was the HIT of the community party! He actually made like $15! It made enough money for all of us to eat and for him to play a bunch of games! Super thrifty if you ask me! You could also do a lemonade stand, cookie stand, dj booth…Use your imagination! SOOOO easy and SOOOO cheap! Happy Halloween!
Tip #5
Thanks to Michelle for todays Halloween tip, ( these are so darn cute)
I wanted to share with you a homemade halloween costume I did for my twins last year, This is very thrifty to make I spent a total of less the $5 for both costumes, I attached a pc for you and here are the deatils of how to make it and I hope you and your readers enjoy this. They were a huge hit last year. My twins Emylee and Shaylee were a BUNCH OF GRAPES
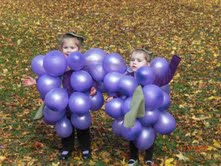
I made the purple grapes so I started off with purple shirts and black leggings.
I bought a large bag of purple balloons at the party store, a box of safety pins, and some green felt .
First you must blow up all the balloons, make sure they are different sizes. After all balloons are blown up this is where your crafty skills need to come in.
You will need to attach the safety pins to the balloons tie, be careful not to puncture the balloon.
Start at the top of the shirt collar, and in a upside down rainbow motion start to pin them to the shirt. My kids were small so the top layer was 6 balloons the second layer 5, 3rd layer 4, 2nd layer 3, then 2 then 1.
Green felt to make the stem and leaf, cut out a large leaf to attach to the middle of bunch of grapes.I then cut a a small circle and attached to their heads with bobby pins, and your done , you will have a great bunch of grapes!
Comments are closed.