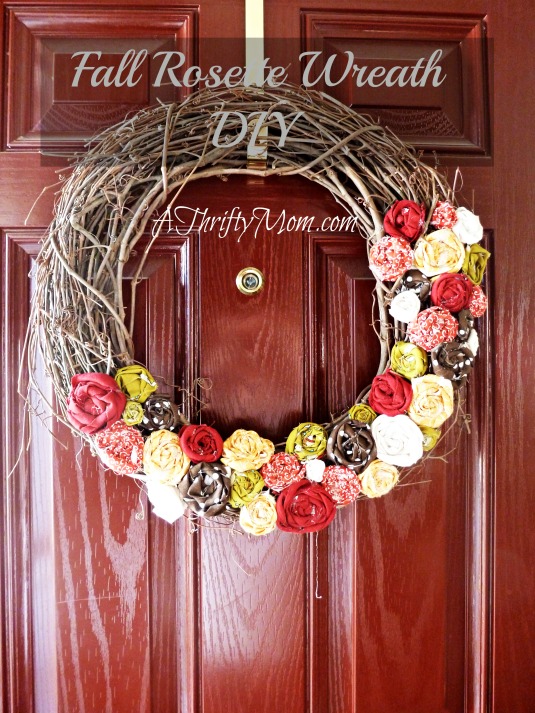

Fall Rosette Wreath~DIY
For the most part, my house stays the same year round, with maybe a craft or two to celebrate any given holiday. However, once fall arrives, it all changes, and doesn’t go back to normal until after Christmas. I love incorporating the beautiful hues of the fall season in my decor. The rich oranges, reds, yellows, browns and greens are just gorgeous. This wreath was created to hang on my front door for fall, but you could easily pick any color scheme to use and hang it anywhere in your home.
You will need:
Fabric (scraps will do, but they need to be fairly long to get a good size rosette)
Fat quarters or scraps in colors of your choice
A wreath form (use a coupon to get a great deal)
Hot glue gun
Hot glue sticks
Patience, you’re going to be rolling a lot of rosettes.
To begin, you can cut or rip your fabric in strips. If using a fat quarter, just rip them the length of the fabric. Make them at least an inch wide, varying for each flower so that each rosette isn’t exactly the same size.
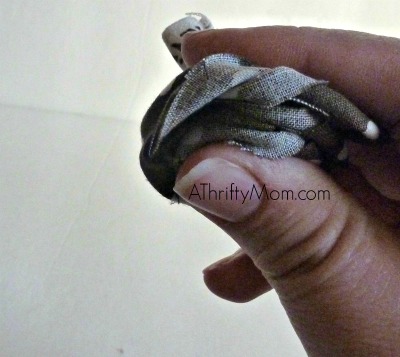
Begin by folding your strip in half, lengthwise, and tie a knot in one end. As you twist the fabric around your knot, be sure to fold it over every time, or two. If you want a tight rosette, hold and twist with a little resistance. If you would like them to be larger and not so tight, just hold it rather loose. You can play around with it to get the rosette just the way you want it. Be sure to add a dab of hot glue every couple of twists to hold in place. If you don’t you will get to the end and it will fall apart and make you really angry. 😉 I find that holding my rosette between my fingers helps me control the shape of it more. If I am “squishing” it like this, it isn’t as likely to unravel, or become tall and messy looking.
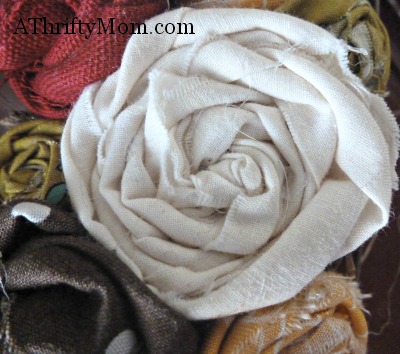
Once you are done rolling your rosette, hot glue the end on the bottom, where it won’t show on your end product. I love how some of them have a tattered edge, and that they don’t have to be perfect to be beautiful.
Continue rolling rosettes until you have burned all of your fingerprints off. Okay, maybe not, but it felt that way by the time I got done!
I rolled all my rosettes and then began gluing them on, just to make sure I had a good layout with several different sizes to attach.
There isn’t a whole lot of room to glue on some of the little branches on these wreaths, so you may have to hold your rosettes on for a minute to make sure the glue has bonded with the wreath well. As you add more rosettes, it isn’t a problem, but at the beginning it may seem like it isn’t going to work, but trust me and keep going!
There, that wasn’t hard, just a little time consuming. All worth it with your beautiful, new wreath!

Anita Esch Montgomery these are a large version of the rosettes you make for hair clips
Gather Up Your Grape Vines Kiddo.
Chrissy Barrow a new wreath.
beautiful gives me an idea
I like it the way it is… I don’t think it’s crooked. I think she wanted it to be the way it is. It’s pretty and you could get holiday colors if you want to do a Christmas one… or a sports team one… a spring one with pastels… very cute and easy… I like easy crafts.
It doesn’t speak to me.
what about a chrismas one
Its got to get turned, its crooked.
You can PIN it here http://www.pinterest.com/pin/63754150948554240/
Jacki Johnson-Caddy, we should do this!!