DIY a unique 3d wood craft
Come learn how to DIY a unique 3d wood craft using wood blanks from the store, scrapbook paper and Mod Podge. It is so easy, you may want to make more than one.

I love to craft. But finding the time to craft can be hard. Not to mention that you have to buy the wood, cut it, sand it, paint it and by then you probably don’t even want to do it anymore! I found this cute wood sign at the store and had a fun idea for it. I painted it in a rainbow color scheme, but then I really didn’t like the way it ended up looking for what I had in mind. Story of my life! I decided to grab my favorite matte Mod Podge and put some scrapbook paper over it instead and love the way it turned out! Happy mistakes! Here is how I did it.
You will need:
Wood blank (I couldn’t find the same size, mine was 8×8, but this is close and the same brand)
scrapbook paper (optional. These boards are so cute on their own too.)
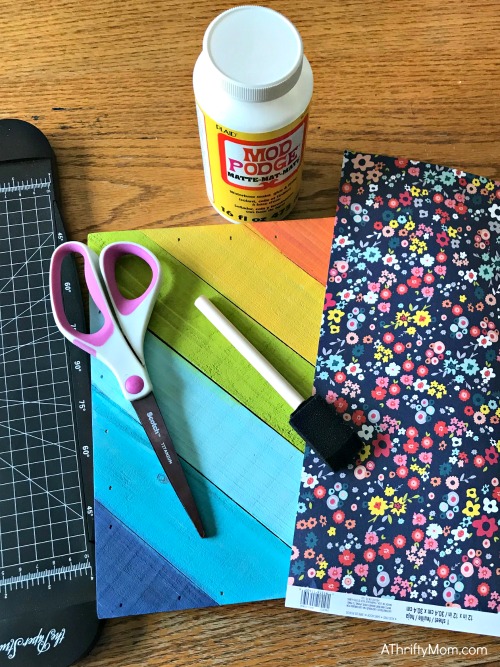
Something with a flat side to rub down paper after you have Mod Podged. An old gift card or credit card work great. I used a spatula because that is what I had close.
3d letters, wording to add to your sign. Found similar ones here, just watch the size. I got mine at Hobby Lobby, but any craft store should have something similar
In the above picture you can see how I painted a light coat of the rainbow color scheme. I didn’t want it to be too “primary colors” and loved some of the crafts I have seen online done in it, but just ended up not loving this one. It had a white wash finish to it to start with that would look nice without having to paint over it, but it is going on a white wall, so I wanted some color.
![]()
I always use matte Mod Podge. I have tried using the gloss, and it always turns out looking horrible to me. The matte doesn’t ever look like I even used any, and I like that. If you want a glossy look, feel free to grab the gloss, but I always recommend matte.
I really liked the diagonal lines on this craft and wanted to keep that look. It would’ve been fairly easy to just lay my paper on and Mod Podge it all at once, but I chose to cut the paper into the diagonal strips. Measure and cut the paper either with your scissors or your craft trimmer. I like the nice, straight lines of the craft trimmer since I can’t seem to cut straight lines on my own.
Working with strips makes it easier to make sure you get it all pressed down before it dries too. Rub a thin layer of Mod Podge on board, lay paper on it, rub out all bubbles with your spatula or credit card and then put another layer of Mod Podge over the top of it. Make sure you get all the edges and corners. Be sure to press firmly while pressing out bubbles, but not so firmly that you rip your paper. Continue those steps until each section is covered.
Once it is dried take your words. You can use a 3d look like I did, cut it out of vinyl, hand write it. There really is no wrong way to make a craft that is going in your home. Do what you like. I just really liked the depth of the wood “family”. I spray painted the word gold and love it.
![]()