Many times a week we get emails from followers saying that when they click on a link old out dated post come up. Or that when they click a link to print a coupon, old coupon that were a month or more old show.
What is happening? Well it isn’t our website or any other website. What happens is that when you are on the computer and you visit a website, your computer stores little pieces of information about that website. It stores this information to make the next time you visit that same website, it can pull up the website faster using the stored information. This is great when you casually visit a particular website. But sites like ours where deals post sometimes more then one an hour, sometimes readers visit very frequently. Sometimes multiple times a day, just to keep up with each new deal. So each time they visit your computer continues to store little bits of information. Doing this your computers storage area quickly becomes crowded and full. And just like you in a crowded room, you can become confused, agitated and start sending mixed signals just trying to keep up.
So how do you fix this? I is very easy when you follow this step by step instruction thanks to WikiHow. Below are steps to take for each type of web browser.
Internet Explorer 9
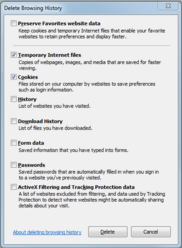
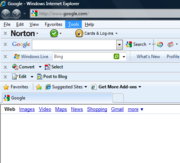
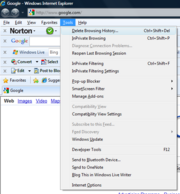
Once your browser is open, click the gear at the top right to open the settings menu. Then, select Safety and Delete Browsing History… Or, optionally you may simply press Ctrl-Shift-Delete to open the Delete Browsing History window.
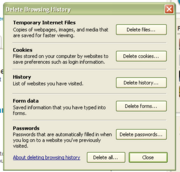
Select Temporary Internet Files. You will also need touncheck all the other boxes, especially Preserve Favorites website data. This option makes the window also delete objects from websites in your Favorites folder, which is necessary to completely clear your cache.
- Click the Delete button near the bottom of the window to perform the operations (i.e. clear your cache by deleting temporary files).
- Your computer will work for a moment, and then the process will be complete. You’ve successfully cleared Internet Explorer 9’s Cache!
Internet Explorer 8
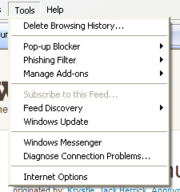
Once your browser is open, click the Tools menu. Or, optionally you may simply press Ctrl-Shift-Delete to open the Delete Browsing History window (and skip step 2)
Click on Delete Browsing History…
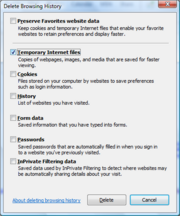
Select Temporary Internet Files.
- Click the Delete button near the bottom of the window to delete your temporary files (i.e. clear your cache).
- If you want the browser to automatically clear the cache whenever you close it, click theAdvanced tab. Click to check the box next to the Empty Temporary Internet Files folder when browser is closed option (in the section labeled Security). Click OK. This will delete everything except cookies.
- Note: IE8 has a “feature” which retains some cookies even after you clear your cache if you do not UNCHECK the “Preserve Favorites Website Data.” If you truly need to clear your cache, you will want to uncheck this!
Internet Explorer 7
Open IE 7 and click the Tools menu. Click the Delete Browsing History link at the top.
Under the Temporary Internet Files heading, click Delete files…
Click Yes when you see the prompt asking if you are sure you want to delete all temporary files.
- Alternatively, clear your cache for just the current page you’re visiting. Press and hold [Ctrl] on your keyboard, then Press [F5] or click on the Refresh button (square button on the toolbar with opposite-facing arrows).
Firefox
Firefox 4.0 / 5.0 / 6.0 +
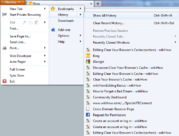
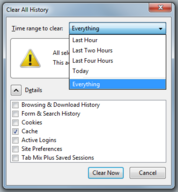
Click the Firefox menu in the top left corner. Next, select the right arrow next to History >, and click Clear Recent History (or click on Tools then Clear Recent History if you don’t have the FireFox Menu) Or, you can press Ctrl-Shift-Delete to open the recent history window.
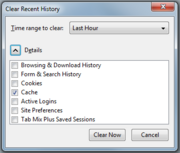
Make sure ‘Details’ is expanded, then select Cache from the list. Uncheck everything else.
In the Time Range to Clear: drop down, select Everything.
- Select Clear Now.
- Your computer will work for a moment, and the process will be complete. You’ve successfully cleared Firefox’s Cache!
Firefox 3.5 / 3.6
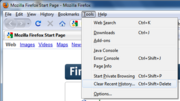
Click the Tools menu, then select Clear Recent History.
- Note: If you don’t see the Tools menu, hold down the Alt key then press the T key to access Tools.
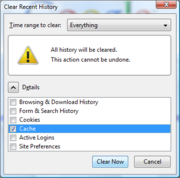
Choose the time range of cache you’d like to clear.
Click on Details and make sure Cache is checked.
- Select Clear Now.
Firefox 1.5 / 2.0 / 3.0
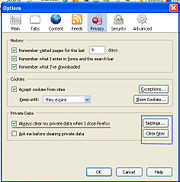
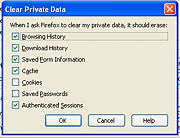
Below is the full method, although it is possible to simply go to Tools, and select Clear Private Data.
Go to Tools and select Options… (on Linux, go to Edit thenPreferences).
Go to the Privacy tab and click the Settings button.
Make sure Cache is checked on the list of options to clear.
- Return to the Options menu and click the Clear Now button.
Firefox 1.0
- Click the Tools menu and select Options (on Linux, go to Edit then Preferences).
- Click the Privacy button and select the Cache tab.
- Click the Clear Cache Now button.
Google Chrome
Chrome v10 +
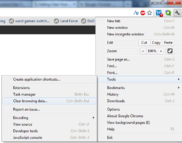
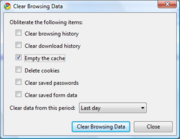
Once your browser is open, select the Wrench icon (the settings menu, located in the upper-right corner) then,Tools, and Clear Browsing Data…. You can also access the Delete Browsing History window by pressing Ctrl-Shift-Delete, or clicking on this link: [chrome://settings/clearBrowserData].
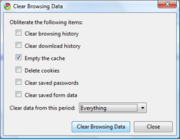
Select the Empty the cache check-box. Uncheck everything else to avoid deleting data unintentionally.
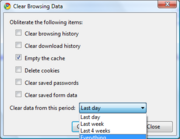
- In the Obliterate the following items from: dropdown menu, select the beginning of time.
- Click the Clear Browsing Data button. Chrome will work for a moment, and then the process will be done. You’ve successfully cleared Chrome’s Cache!
Chrome v1 – v9
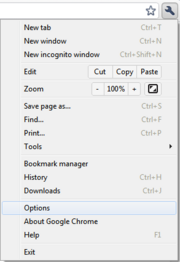
Once your browser is open, select the Tools menu (the wrench in the upper-right corner) and select Options (Preferences on Mac).
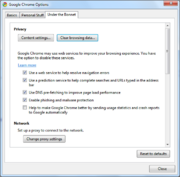
On the Under the Hood tab, click the Clear Browsing data… button.
Select the Empty the cache check-box.
You can also choose the period of time you wish to delete cached information using the Clear data from this perioddropdown menu.
Click the Clear Browsing Data button.
Safari
Safari for Mac OS X
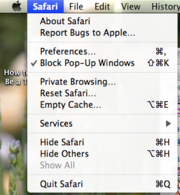
Once your browser is open, click the Safari menu and selectEmpty Cache….
- Click Empty.
Safari for Windows
- Once your browser is open, click the Edit menu and select Empty Cache….
- Click Empty.
Opera
- Once your browser is open, select the settings menu and click delete private data.
- Click the details button.
- If you do not wish to delete cookies, saved passwords, etc., remove checks from them in the list.
- Press delete.
- If you are using the browser, go to History (accessible from the start page (press start button) & extended toolbar) and touch Delete All.
- Then go to the start page again and touch Settings.
- Then scroll down until you find Delete Cookies and touch that.
Mozilla SeaMonkey
- Once your browser is open, click the Edit menu and select Preferences.
- In the left-side list, open the Advanced node and select Cache.
- Click the Clear Cache button.
Konqueror
- Once your browser is open, click the Settings menu and select Configure Konqueror.
- Scroll down in the list of images and select Cache.
- Click Clear Cache.

