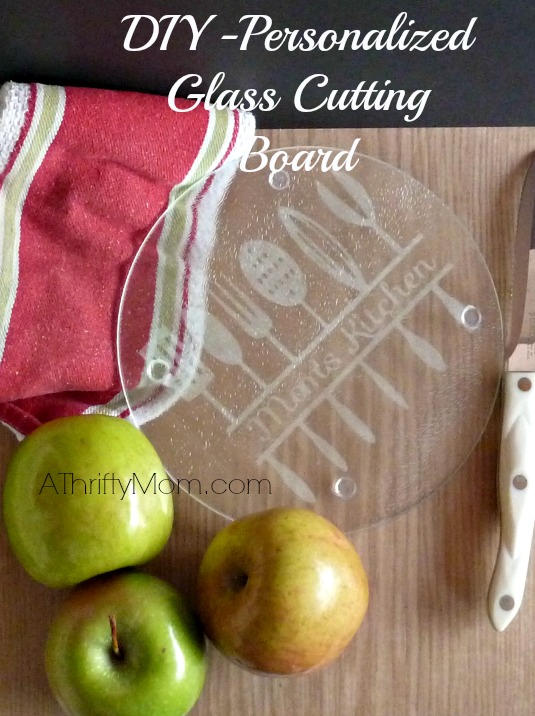
Personalized Glass Cutting Board~DIY
Holiday time is right around the corner. Time to start thinking about giving gifts. Giving something personal always makes the gift all the more special. This cute, personalized cutting board won’t break the bank, can be personalized to suit the person receiving the gift, and comes from the heart, what could be better? So lets get started!
You will need:
Glass cutting board (The Dollar Tree has square and round ones)
Etching cream (you can get it here. A small bottle really lasts a long time)
Paintbrush (to apply etching cream)
Small piece of vinyl or contact paper (for stencil)

To start, make sure you use something to protect your surface. If you spill you don’t want to ruin your furniture.
You need a stencil. You may be able to find a stencil already made at a craft store that you love and want to use. If not, use a piece of contact paper or vinyl. These particular cutting boards are only about 7.5 inches, so I didn’t need a very large piece. If you have a computer program that you can design something, great! You could also find a design you like, and simply print it. Then trace onto your stencil paper. Write with something that is going to show up it is okay if it isn’t pretty, its just the stencil. I actually have a program where I designed mine, which is helpful since my cutting isn’t great. Be sure that when you are cutting your stencil, you want to cut the part away that has the design. Example; if my stencil was a sticker, I would want to keep the pink and black designed area, it is the designed part. Since this is going to be a stencil, you actually want to get rid of the “pretty” part so that is what will show up on your project. Make sense? *Important, make sure you mirror your image. You will be putting it on the bottom, so if it isn’t mirrored, when you apply it, it will be backwards!

See how my words are backwards? That is what you want.
Once the stencil is ready, you are going to stick it to the bottom of your cutting board. You don’t want the etching cream to be used on a surface you are preparing food on.
Apply the stencil, making sure to smooth it out. If there are bubbles under the vinyl, that is okay, as long as they aren’t in your design. You want the design area to be stuck firmly to your surface so that the etching cream doesn’t seep underneath and mess up your design.
Carefully apply your etching cream in small taps. DO NOT use a stroking motion. You risk rubbing some of the cream under the stencil. Only use an up and down patting motion. Cover it with a good, thick layer.

It really goes on easily and doesn’t use as much as you might think.
Now, the bottle says to leave on for 5 minutes. If you are going for a very light image, go ahead and follow that. If you want to be able to see your image when you are done leave it on for no less then 20 minutes. I forgot about mine and left it on for an hour. I think it turned out perfect. Peel off your stensil and rinse well with water. I use my hands to rub all of the etching cream off. Be sure to wash your hands well when you are done. There you go! You are all done! Add some yummy snacks, some new kitchen towels, or a nice recipe book and give a gift that is sure to touch their hearts every time they use it!

Looking for More Online Deals? Click here for more THRIFTY DEALS. Please note that Amazon prices tend to change often so prices may be higher or lower without notice.
So this works like a glue ? If I cut out my design with my cricut on vinyl then place it on the bottom of my cutting board the etching cream will hold the vinyl ?
That’s a great idea for a hobby.
I would also like to know how to put a picture on a cutting glass cutting board.
Like a family member or pet but not etched in.
Love this!!!