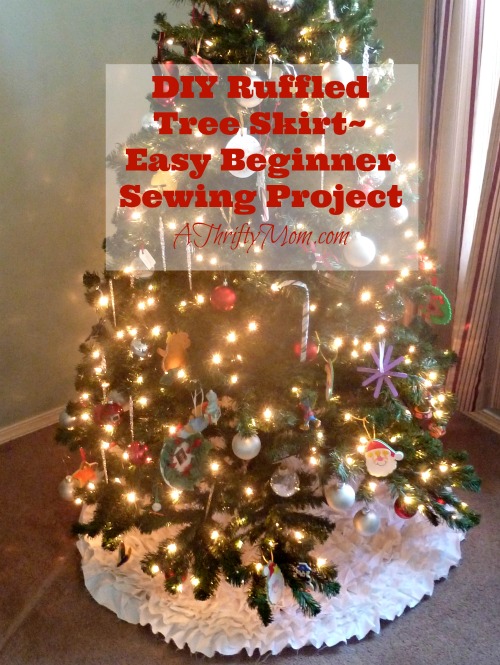
DIY Ruffled Tree Skirt~ Easy Beginner Sewing Project~ Made from a bed sheet
I know, I know, this tree skirt looks a little bit complicated and far beyond the reaches of someone just learning to sew, but I promise, it is actually really basic! There are no pattern pieces to cut, no pinning, no “exact science” to it. You are basically just sewing a straight line over and over. Pretty perfect to practice. And even better, all of your seams are hidden under the ruffle above them, so if they aren’t straight and perfect, no one will ever know!
What you will need:
An old, basic tree skirt.
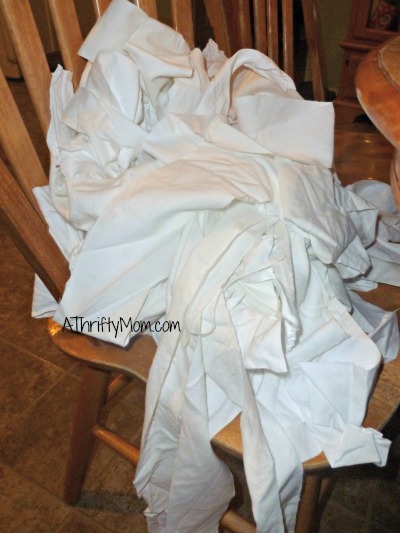
A queen/king size sheet (or 2 twins if doing 2 different colors) I used a king and had quite a bit left over
thread
Scissors
Sewing machine
Yard stick
Rotary cutter if available
If using rotary cutter you will want a self healing mat to put under your fabric
Begin by cutting your sheet into strips of fabric 2.5-3 inches thick by the length of your sheet. They don’t have to be perfect. This will feel like it is going to take forever, but will go a little quicker if you use a rotary cutter. Here is my giant pile of fabric strips. Make sure they are in a nice, orderly pile like mine are. 😉
You will want to find a super cheap tree skirt. Check the dollar stores and thrift stores. You don’t want it to be really thick and plush. I just used my old one, and sewed onto the back of it. The great part about this is that it prevents you from needing a pattern.
Thread your machine and begin at the bottom, largest section of your tree skirt. You will be working your way up, that way each layer will have the seam covered by the layer on top of it. When you sew your strips onto the tree skirt, follow the curve of the skirt.
To make the ruffle, simple fold your fabric and sew over it. I did that step every couple of inches probably. I didn’t measure, because I didn’t want them to all be exact. Continue that step; fold and sew repeatedly. If your tree skirt is very thick, you will have to pull a little more to feed it through the machine, another good reason to go with the thinnest, cheapest one you can find.
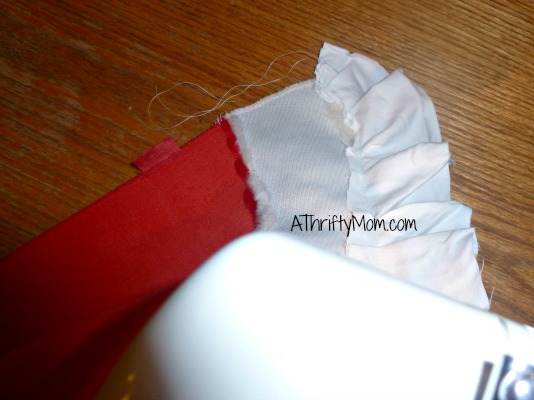
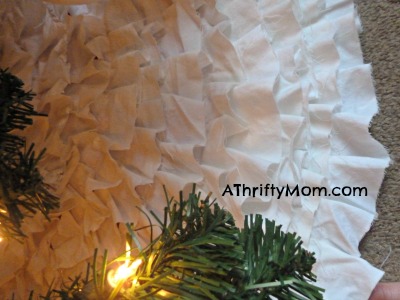
I didn’t take a lot of photos of the actual sewing process. Turns out I only have 2 hands and they were busy feeding my tree skirt through and folding my fabric. Sorry this lousy shot is about all I have that shows a close up of what the ruffles should look like.
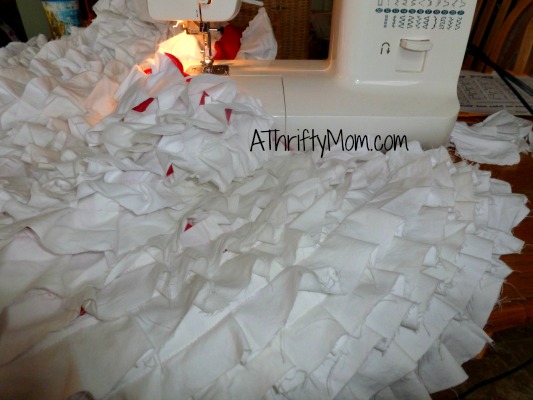
When you run out of a strip of fabric, simply pick up another, fold the edge under and sew it in with the end of the previous strip. This will help it appear to all be one continuous strip of fabric. When you reach the end of a row, make sure to back stitch a couple times to prevent it from unraveling.
Then repeat again, and again and again. More then sewing skills, this project takes patience and time. Get up and walk away when you need to so that you can enjoy the process when you are creating it. On this pic, you can see some of the red peeking out from under my ruffles, but if your ruffles are close enough together, that shouldn’t show when the tree skirt is laying on the ground. Be sure that if there is Velcro to attach the tree skirt that you leave access to it so you can still close the skirt around your tree. You could also use some ribbon that coordinates with your fabric and sew on a tie instead. That would look very classy.
Once you have sewed your billions of ruffly strips and feel like you never want to see another ruffle again, your tree skirt should be covered. Make sure to trim all of your threads from the starting and ending each row. See what I mean about it being great for beginners? Think of all the practice you just got learning to control the pedal speed and keeping the control over the needle going as straight as you can. You can make this as ruffly or as flat as you want. For a fuller, more ruffly skirt you will place your rows closely together. If you want a more minimalist approach, space them a little further apart. How ruffled it is is really just a matter of personal taste. This may be my favorite craft I have ever made. Look at all the ruffly goodness! I can’t get enough!

I’ll take 1 in red. Hint hint Tami. 🙂
🙂
I think it is fun too
Tami did such a great job on it
Hey! This looks doable AND looks like fluffy pretty snow!
Very pretty!
LOVE the tree skirt & wish I could sew.
Hey Tonya, there is a ton of tutorials for nonsew versions of this as well. You need a ton of hot glue, but they turn out just as pretty!
Such a fun idea… looks simple to
Like Share or PIN so you can remember how to do it
what a fun idea !!!