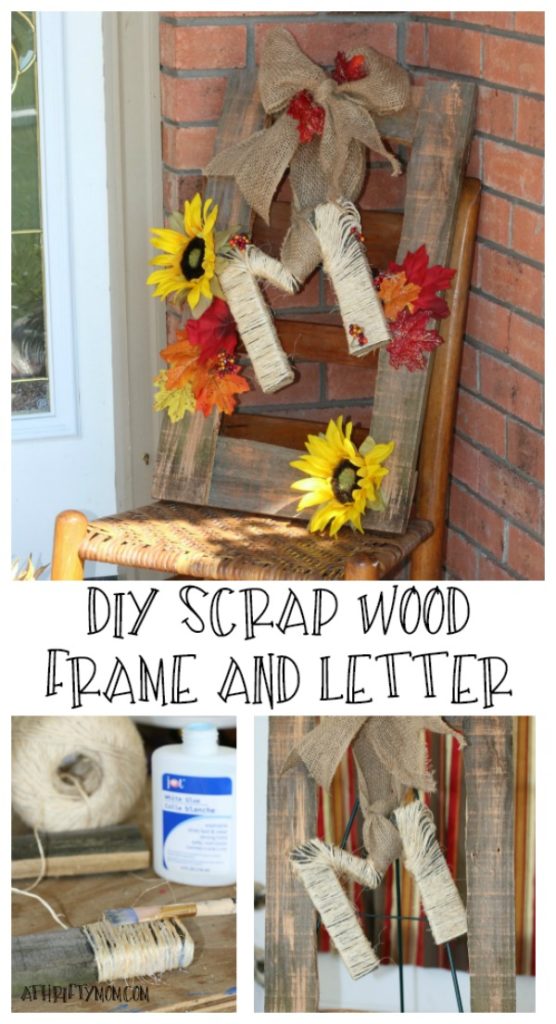
DIY scrapwood frame and letter craft
Have some scrap wood left over from another project? Make this DIY scrapwood frame and letter craft that are totally customizable for whatever size your space needs and your own initial.
This is a frugal project that you can make with a few supplies from around your house. The best thing about this craft is that it is supposed to be imperfect, that adds to the charm! Add paint or stain in whatever color you have on hand (or buy small containers if you need to) and you may have everything you need to make it already!
First things first, you need to construct your frame. Length and width can be determined by the scraps of wood that you have on hand. The pieces used for this project were from a fence taken down, weathered and split upon removal. If you do not have any scrap wood, think about your friends and family that might have some, ask on Facebook or something, chances are someone you know has some pieces that are left over from a project they don’t need anymore.

First, I cut my top and bottom pieces to the same size, and my side pieces to the same size. If you don’t have access to a saw, that’s ok! Leave the raw edges and give it some character. There really isn’t a wrong way to do this step! Secure each corner with small finishing nails. Wood glue comes in handy especially if you are using raw, uneven wood that doesn’t match up perfectly. Just apply some wood glue to each corner before nailing and you will have a sturdy piece once it all dries.
While your frame is drying, start constructing the letter you want. If you have a letter that is typically round (like a C or O), play around with it, there is no rule that says typically round letters have to always be rounded. Match up your scrap pieces to make your letter and glue them together. They may not exactly match sides, but that is okay because we will cover them with twine and glue.
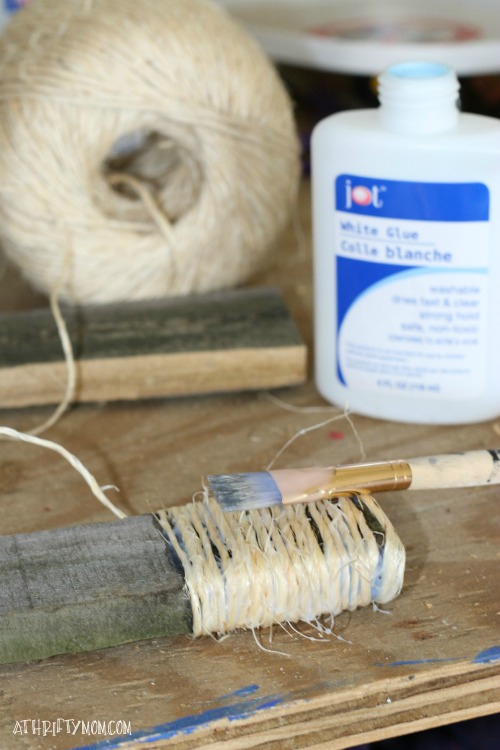
I let my letter dry for several hours, overnight is also good. Once it is dry you can start the process of wrapping it in twine. Don’t have twine? Use yarn or fabric (new or even from old clothing, sheets, tablecloth), rope, shoe laces, get creative! I used simple white glue and applied it with a paintbrush. I wrapped my “M” only about two inches at a time. You could also use Mod Podge. I wanted to make sure that the twine was secure. Apply glue heavily to the wooden letter in small sections and wrap your twine around the letter. The twine or yarn doesn’t have to be perfectly tight, but keeping it that way will help secure your letter a little more. After you have finished each section of the letter, use a brush to apply a thick layer of glue or Mod Podge over the twine. Allow to dry for several hours or over night.
I added a touch of copper paint here to my frame. This isn’t necessary, but you can paint or stain it any way you want it or leave it bare. I liked the look of it with some copper paint I had on hand. I just added a little to my brush to give it some depth but wasn’t trying to cover it fully.
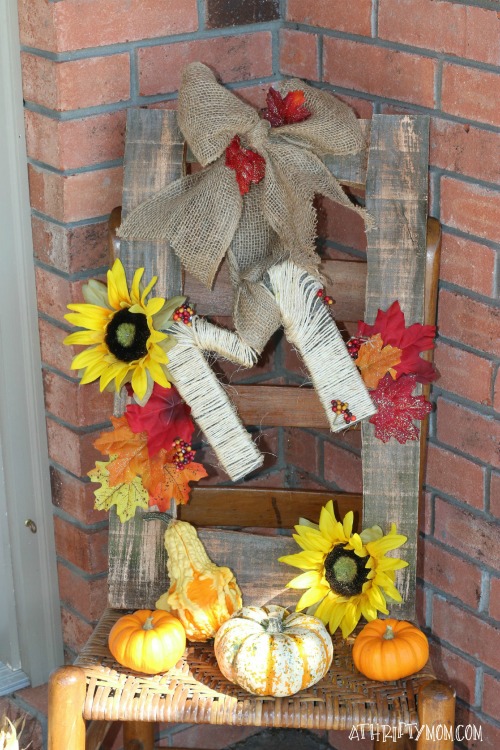
Once everything is dried and you are ready to display it, you will want to hang your letter from your frame. I did this with burlap ribbon, any ribbon, thread, fishing line, yarn will do. If you want and have enough, add a bow on top to dress it up. You can also get ribbon at the dollar store for only a buck.

I repurposed a few items from an old wreath and hot glued them to the frame. The sunflowers were purchased from a local craft store and I removed the stems with wire cutters before gluing them to the frame.
I only have a couple dollars invested into this frame. Think outside the box, it doesn’t have to be all brand new to turn out beautifully and be something you love. This will look great to welcome in fall. I love to place it with some gourds on an old chair on my porch. It would also look nice on a mantle above your fireplace.
you may also like:

Easy Thanksgiving sign

Personalized pumpkin craft

Unique 3D wood craft
For more deals follow us on Pinterest!
***********************
You can take advantage of FREE Shipping with Prime and get it in two days… remember you can try prime for FREE for 30 days.
Try Prime for FREE!
Looking for More Online Deals? Click here for more THRIFTY DEALS. Please note that Amazon prices tend to change often so prices may be higher or lower without notice.
This post contains affiliate links.