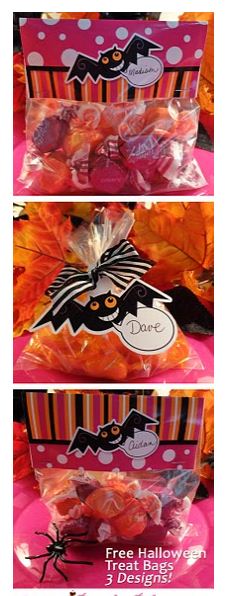
Thanks to Party Planning Center for passing along these adorable FREE downloads for these Halloween toppers. I know Halloween is still a bit down the road, but loved this idea! If you would like to be a featured guest post on Look What I Made, watch for our weekly post each Tuesday called A Thrifty online craft fair, link up and you may be selected for our weekly feature post.
Instructions
1. Download the bag tops and/or Halloween bat label using the buttons below the instructions and save the art to your hard drive.
2. Print using good paper or card stock on the highest quality setting on your printer. (I used glossy photo paper for the samples.)
3. Write each person’s name on a bag top or tag, or write anything else you’d like. It’s a good idea to do this before you cut and attach the pieces, in case you make a mistake while writing.
4a — bags. Cut the width of the bag tops to fit your particular bags. The artwork is sized to accommodate treat bags up to 6″ wide, but you can easily trim it down to fit. Fold the tops in half, then attach them to your stuffed bags with tape, glue or staples.
4b — labels. Use a good pair of sharp manicure scissors to cut out the labels, making sure to include the tabs at the top that will allow you to attach them to the bags. Punch a hole in the tab to allow the ribbon to be threaded through. To thread the ribbon, scrunch up both ends of a piece of ribbon about 15 inches long and push them from the back of the label to the front. Slip the resulting loop over the top of the bag, tighten it and tie a bow, using the bottom end of the ribbon to form the first loop of the bow. That will make the bow sit correctly.
Tip: These would also make great place cards for an adult Halloween dinner party!