
Each day we will be posting A Thrifty Christmas Tip, from our readers. At the end of the month, one of you will win a $100.00 Gift Card. For all the details click here. Keep those thrifty tips coming!!!
Thanks to LilKim for todays Thrifty Tip,
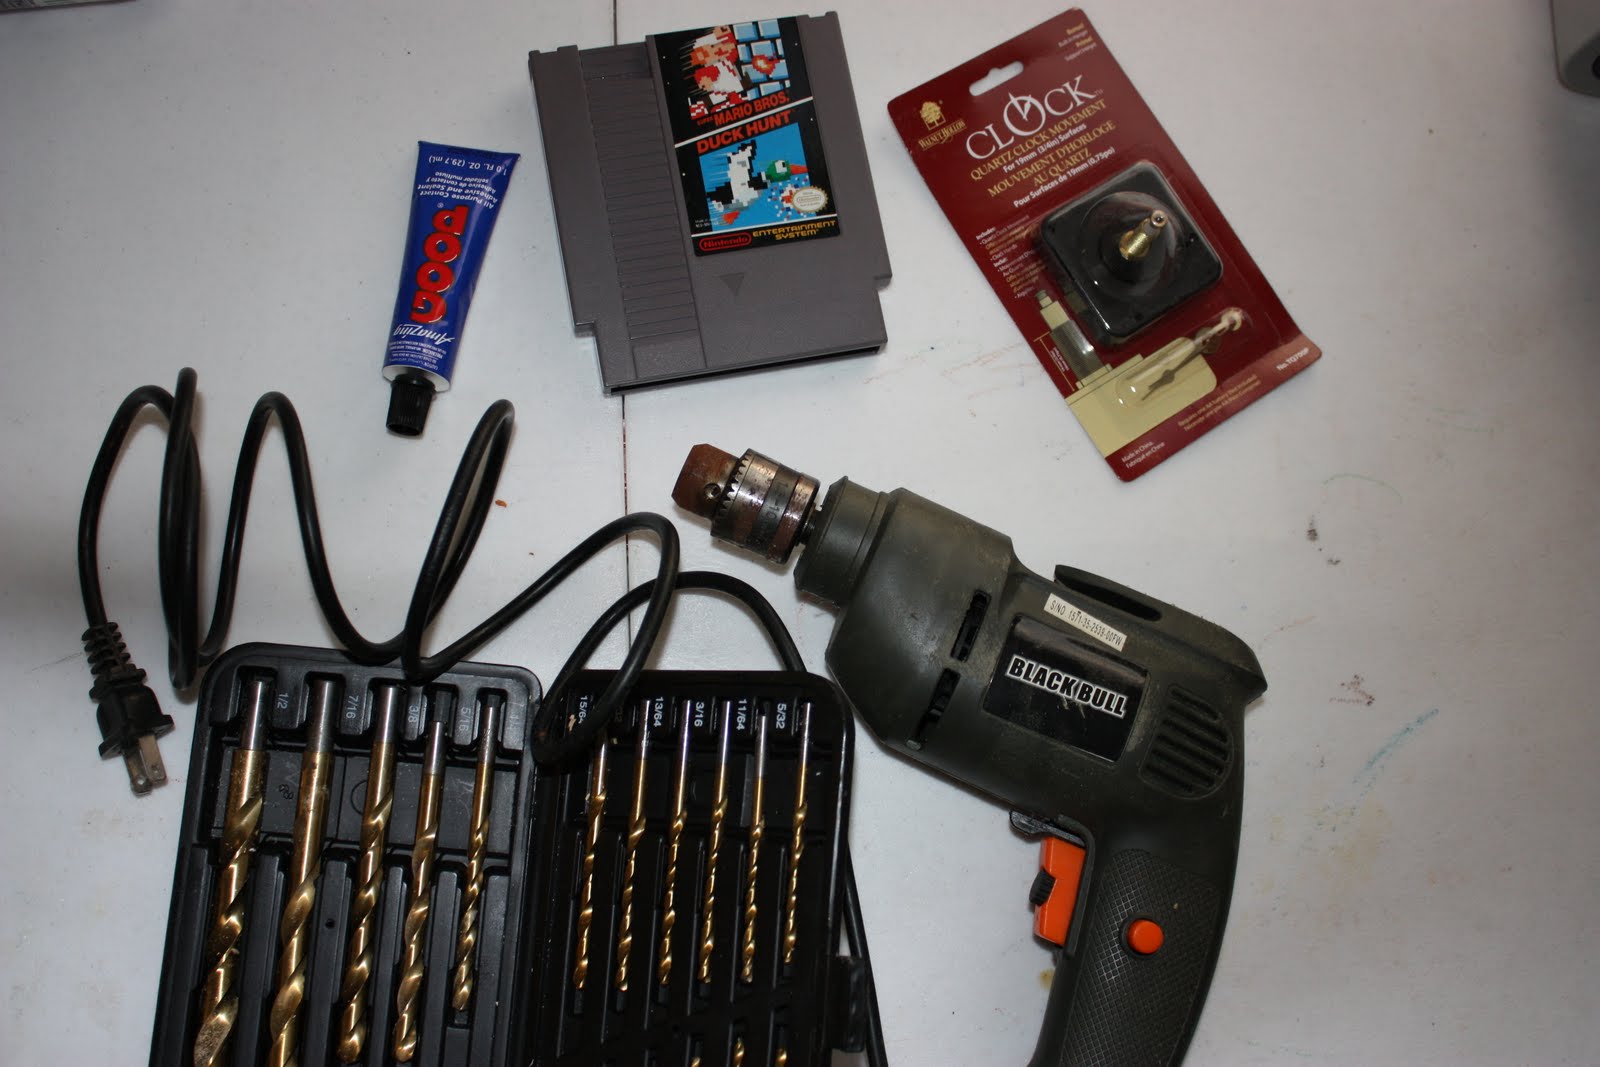
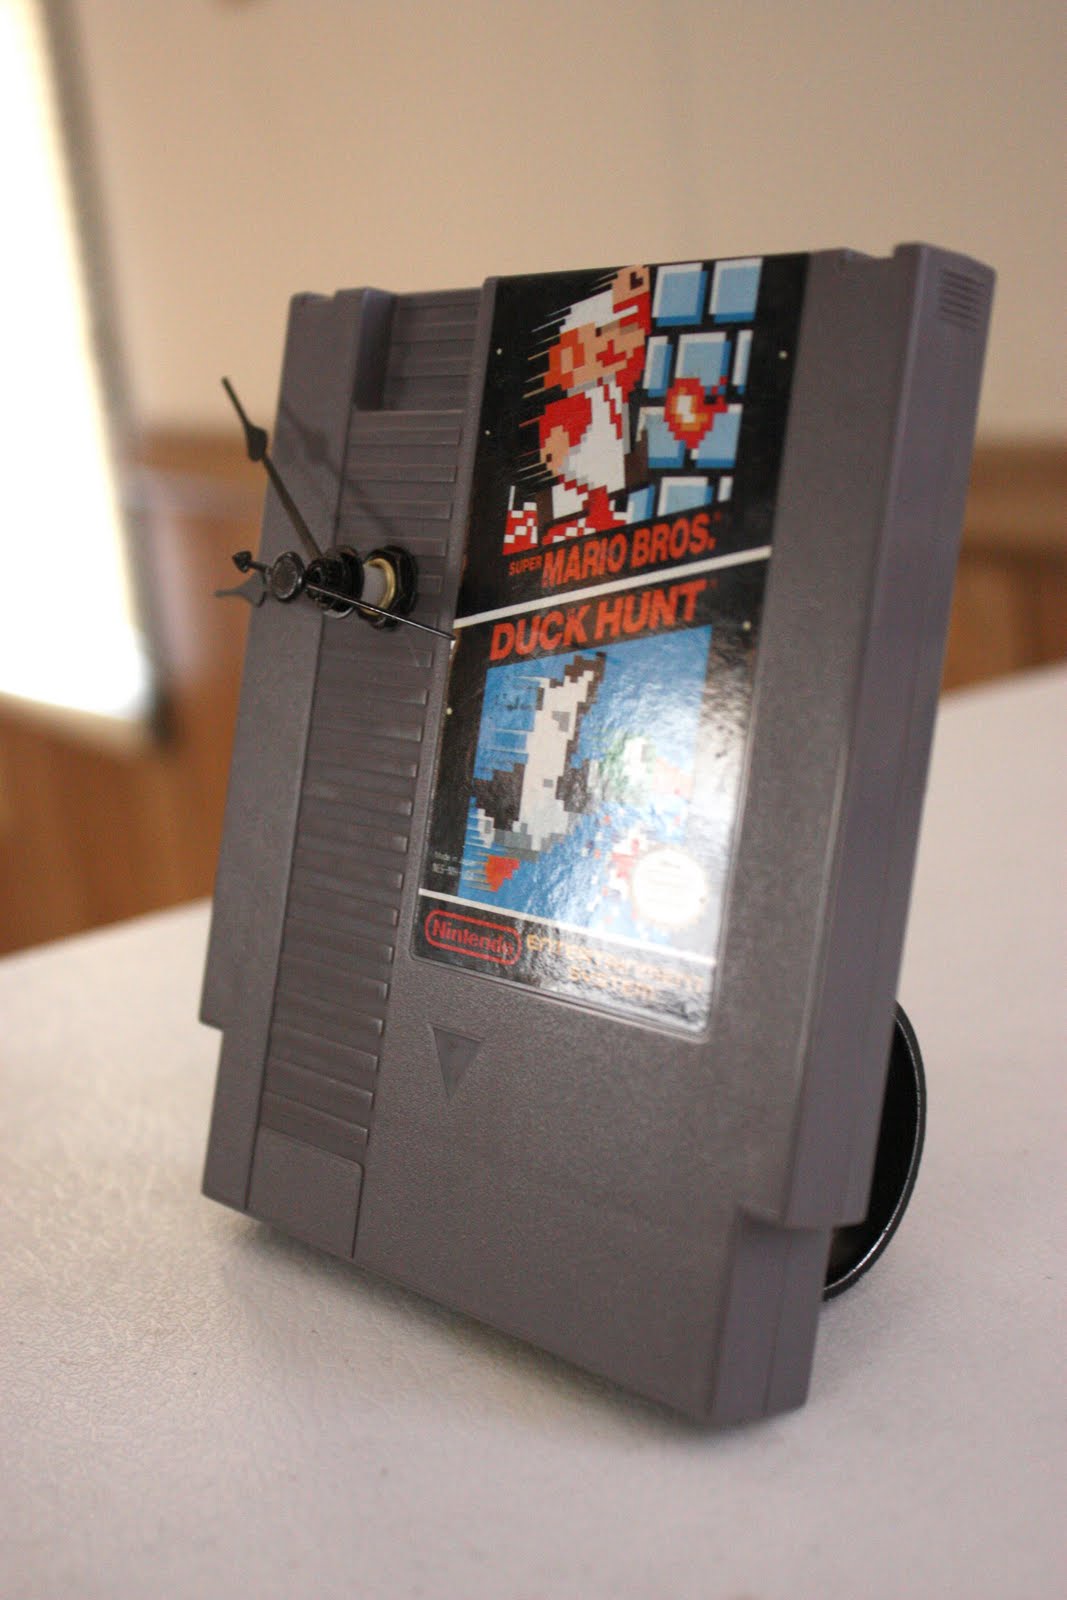
Just wanted to share a gift we made for Christmas this year – Clocks out of NES games! (I always find it super hard coming up with ideas for the teen/20 something guys on my list – brothers!!!
Materials
NES games – super cheap. Check craigslist, used game stores, ebay, or yard sales/flea markets.
Clock Kit – I used my amazon gift cards from swagbucks to get these for FREE. The video games are 3/4″ thick, so you’ll need a clock kit that will fit that size clock face.
Spray Paint – .99 I took offense to the metal colored clock hands and plumbing pieces. If you don’t, you can skip this!
 for the size clock movement that I had, but yours might be different.
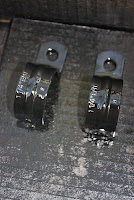
Attatch the plumbing pieces to the back of your clock/game with a super duper adhesive. I ONLY used duct tape to keep them in place while the glue dries TEMPORARILY (though my dad and RedGreen would be a proponent of designing entirely out of the “handy man’s secret weapon”). One on the left side, one on the right. Make it so the bottom of the piece is a little above the bottom of the game (so that the clock will sit at an angle and not tip over). Let it dry at least 24 hours (or the recommended time on your glue)
Comments are closed.