
Thanks to Emily at Saving with a Plan for passing along this thrifty tip on how to stain your concrete floors. Oh my word… I totally feel in love with this idea, and it looks amazing! If you would like to be a featured guest post on Look What I Made , watch for our weekly post each Tuesday called A Thrifty online craft fair, link up and you may be selected for our weekly feature post.
Earlier this year we adopted a dog from our local rescue group C.A.R.E.. this dog was not house trained and in our efforts to “convert” him he chewed a massive hole in our living room carpet all the way through the padding. We didn’t want to replace this with more carpet and didnt want the expense of tile or wood floors. We looked at so many options and then ran across information on stained concrete floors. We completed the process which I will show you below and it turned out amazingly well. It would have cost us over $3000 for new carpet and more than that for tile or wood floors and we purchased the items needed to stain the concrete ourselves and instead got the job done for less than $600 and have ended up with a much better outcome in my opinion. No more renting carpet cleaner or freaking out when something is spilled, I just wipe it up and move on!
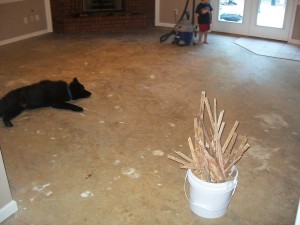
Here are some visuals of different points in our project. The first step is to remove the existing carpet and padding and then thoroughly clean the floors.
So here we are with bare concrete floors after removing the tack strips and yes that is my huge black dog enjoying the cool concrete. The most amusing factor of the whole project was watching my husband try to use a buffer.
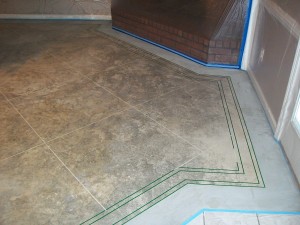
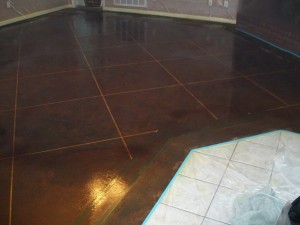
As you can see the tape we laid the lines down to make this look like tile/marble and we did not want to actually cut grout lines into our concrete as we didn’t want our house filled with concrete dust. Always follow the directions on your stain, not following directions caused us to have to do the staining process twice. Here is the result after the second round.
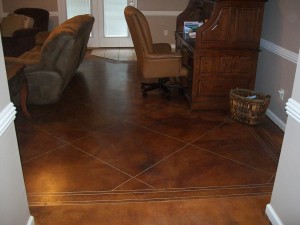
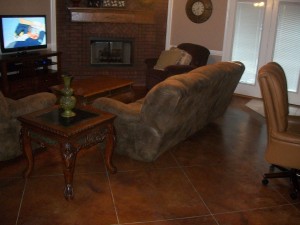
We were finally satisfied with the color so we removed the tape, sealed and waxed the floors after they had completely dried, and there we have the end result. I used a stencil and gold paint to accent the border. In all it took 5 days and it’s pretty maintenance free from there. I do have to re-seal and wax mine occasionally because of my dogs. We also did glass glazing before and here are some tips on how to ensure your suction cups stick.
The limited construction technique is a construction method that prevents the deflection of the stained concrete floor portion by pulling the visuals strengthens wire through the concrete that chains the upper limit and the floor.. http://www.stampedartistry.com/stained-concrete-floors-houston/
Great DIY work, Sarah! It’s definitely one of the best concrete resurfacing techniques that could make your flooring look elegant. It blends easily with the furniture and interior design! Dropping this link here just to expound on the added benefits of having a stained concrete floor! http://www.sundekofpa.com/acid-staining-for-unique-interior-floor/
@Kim Hey there Kim! I hope this could help you: it’s something I wrote about DIY concrete staining done by my company, Sundek of Philadelphia. http://www.sundekofpa.com/staining-an-indoor-concrete-floor/
These floors look great. If anyone wants a more detailed instructions on how to stain your own concrete floors, you can visit http://decorativeconcretediy.com
Hi!
We are building a home in Indiana and have considered doing this in the basement. We won’t have a contractor and are doing much of the work ourselves. Can you tell me what type of finish your concrete had on it before you finished it? Was it a smoother finish or a rough finish? Also, with the finish and wax on the finished project, does it get slick when it is wet?
Your floor looks beautiful and is what I have been looking for! I am so glad I found this!!
Can you email me and tell me what stain products your used. I’ve checked at Lowes and they couldn’t tell me anything. Thanks
Stained concrete is just beautiful. I love how you made it resemble tiles/marble by using tapes. I would choose this type of flooring over hardwood, tiles, and carpet any day. It is just so beautiful and easily maintained. Thank you for this great share!
Having well maintained concrete floors is the envy of many of us. The photos shared in this post are great examples of stained concrete floors. You can tell that they are well maintained. Having your floors stained not only beautifies the area but also helps reinforce its durability. Thanks for sharing.