Candy Wrapper Gift Card/Money Holder Halloween~Witch

Candy Wrapper Money Holder Halloween~ Witch
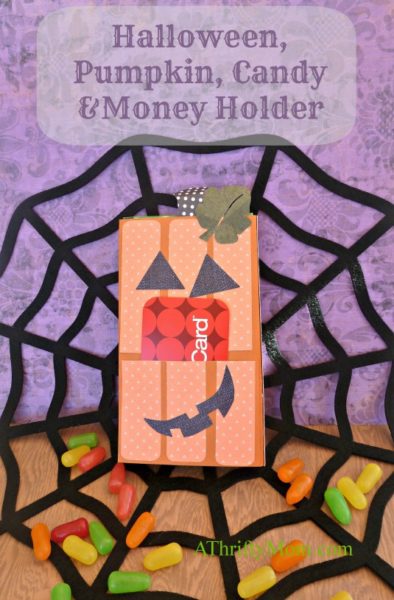
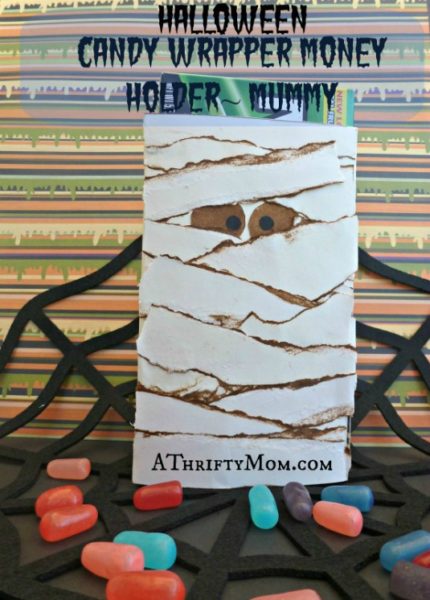
Only 2 more left in our series of Halloween candy wrappers. Today we will learn how to make the witch. If you want directions on the box click here. The Pumpkin, Black Cat and Mummy.
Now that you have your box made in your color of choice, add the envelope for the gift card/money on the back. Lets move on to the witch’s hat. Get a piece of black paper. I used a scrap. I set it on my box to decide how far down I wanted it to go and put a small dot on each side. They are the small, white dots.

I then connected those dots up above to make a pointed hat and cut off the sides. Next you will want to cut the brim of your witch’s hat. Pick your desired length and cut. Glue it on to the front of the hat along the bottom. I wanted a decorative strip on mine. I chose to use washi tape because I had some. Scrapbook paper would work too. If you have never heard of washi tape, it is a Japanese, thin, paper tape that is so great for many things. There are so many places to buy it and patterns to get it in. I bought some of mine on Amazon. This is the set I have, but the strip I used came from somewhere else that I can’t remember now. Sorry! 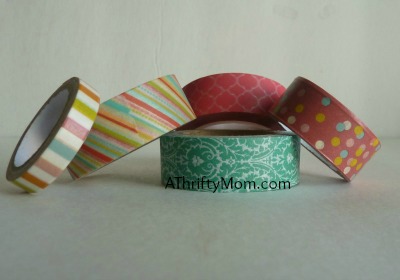
These are some of the washi tapes I have. They are so fun to play with, and pretty inexpensive too!
Now we will move on to the hair. Simply cut strips of card stock. They don’t have to be super long. You are going to attach them to the back of the witch’s hat. I cut about 8 strips total. Then fold some in half. I folded them so they made a v shape and left the others long.
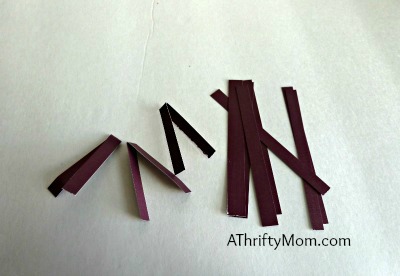
Glue the smaller V shaped pieces along the front like bangs. (If you don’t wish to use bangs you can skip folding the pieces of paper and cut fewer as well.)
I like the witch looking a little crazy, so I glued my longer strips on a little crazy. *Side note: I did try to use yarn for this originally, but I didn’t like the bulk it added behind the hat. However, it still works if you want to go that route instead.Once your hair is glued on, attach your hat to the box.
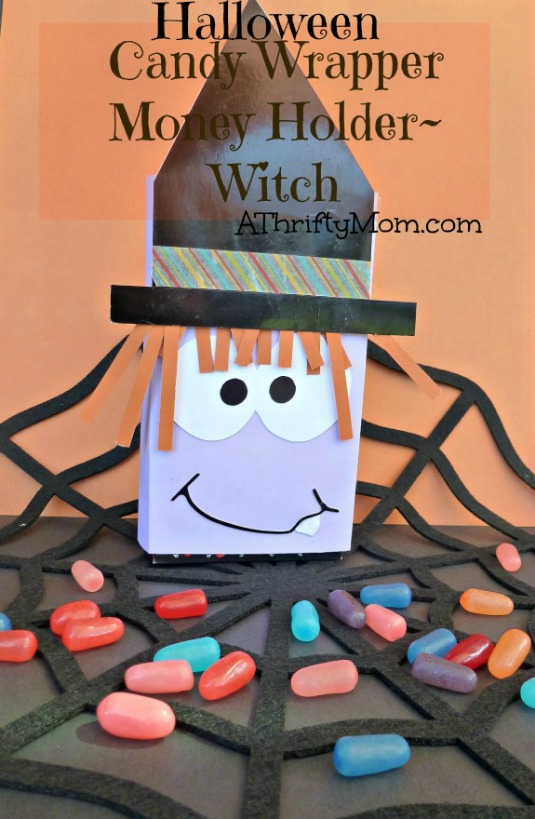
For the eyes I simply cut a large number 8 out. I wanted them to be different than what I had done on the previous ones. I liked having them connected. Obviously you could do them different if you want. I am partial to these ones. I think it gives our witch a friendly vibe as opposed to a scary witch. Just my thoughts. Add black buttons, or paper for the black part of her eyes.
Using a black sharpie, you can draw her smile on. If you want to try to cut the smile out of paper that would look nice also. My witch has a wonky tooth, which I cut out with white paper. Printer weight paper works great.
And here she is!

Just in case you missed them, here are the links again for the rest of the series;

 and mummy.
Looking for More Online Deals? Click here for more THRIFTY DEALS. Please note that Amazon prices tend to change often so prices may be higher or lower without notice.
Just in case you missed them, here are the links again for the rest of the series; the box, pumpkin, black cat, and mummy.
Looking for More Online Deals? Click here for more THRIFTY DEALS. Please note that Amazon prices tend to change often so prices may be higher or lower without notice.