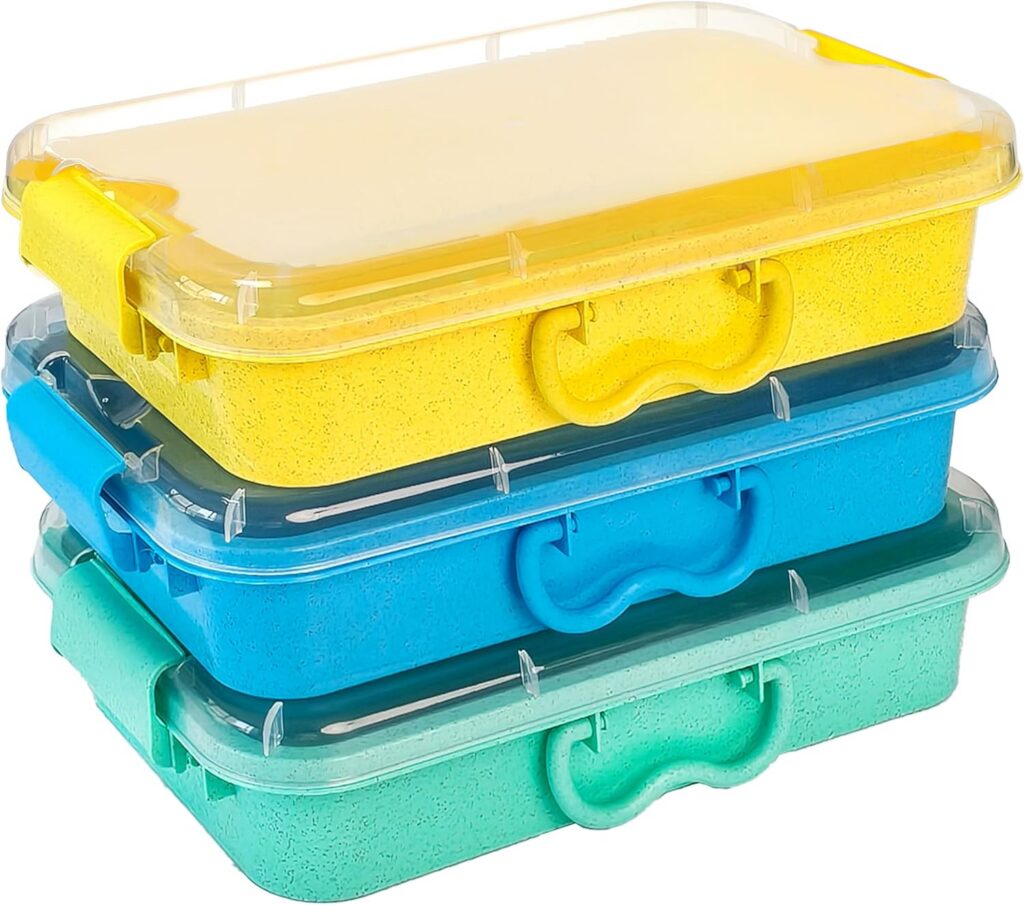
CRAFTS

Last updated by at .

Christmas Stocking Stuffer

Sticky gemsOur girls love to bedazzle their clothes, purses and just about everything they can get their hands on. We got some of these gems for their crafts and the kids love them. They just bedazzled their hand mirror and her black hat. And with a 500 piece kit there is a lot to go around. And as low as $8.08 with it being eligible for free shipping tooAdhesive Back Jewels (500 pc)

Leave a Comment: 0 comments

Filed Under: 2012 Christmas gift, Amazon Deals, Free Shipping, Gifts for Her, Online deals, Stocking Stuffers, Thrifty Craft Ideas

Tags: , , , ,

Disclaimer: This post may or may not contain affiliate links.
SUBSCRIBE and never miss a thing!

Etching Pen
I have always needed one of these when I bring my cookie sheets or cake pans to an event! And even my kids toys would be good to etch their names on them.
And at only $5.68 and free shipping why not!
SODIAL- Handheld Engraving Etching Pen Rotary Tool

Leave a Comment: 0 comments

Filed Under: Amazon Deals, Free Shipping

Tags: , , , ,

Disclaimer: This post may or may not contain affiliate links.
SUBSCRIBE and never miss a thing!

My Mom is super crafty and she can make something fun out of just about anything!   This summer she was in charge of our big family reunion and wanted to be able to make crafts with the kids on a limited budget.  That is when she came up with the idea to make a stick horse out of an empty 2 liter soda bottle.  Below is what she posted on her Ashbees Crafts  facebook page. 

Do you have a bunch of empty soda bottles and wonder what to do with the bottles? I like to recycle but it is such a hassle that usually I just throw the bottle away. Or fill it with water for my water storage. Here is a fun idea on how take a pop bottle and recycle it into a cute stick horse. Great for cowboy parties or a cowboy theme Family Reunion.

 Can you see my idea starting to take shape, the horse in the making. First spray the bottle the color you want your horse to be. I just used grey primer on this bottle. But on the other horse I used  cheap brown paint from Walmart.
 I cut out some ears, two layers and glued them to the top of the head. Then I torn strips of some old fabric I had on hand for the mane. I inserted the stick and put a screw from the back into the stick. Then I tied the bangs to the screw. I tied the rest of the strips around the back part for the mane. Glued on the eyes and with a black marker drew some eyelashes and nostrils.

There you go, simple and fun. Be sure to visit my store Ashbees Crafts  for more ideas!

More activities, projects and fun things to do with your kids this summer.

Dirt and Worms ~ Fun summer recipe for kids

 Make your own Crayons ~ Activities to do with kids

Be a Back Yard Detective ~ Activities to do with kids

Wiggle Worm Game ~ Games to do with kids

Make your own Bean Bag Toss ~ Games to do with Kids

Watch a Local Race ~ Frugal Family Activities to do

Corn Starch Gak Science Project to do with kids

Color Collage with ads from the paper

DIY Chime Set ~ Music Fun For Kids

Recipe for Homemade Slime

 Under the Sea Art Project for kids

Balloon Barrettes DIY Kids Fashion

Lady Bugs made out of an egg carton

Exploding Soap ~ Microwave Science For Kids

Leave a Comment: 0 comments

Filed Under: Ideas for Entertaining kids

Tags: , , , , , ,

Disclaimer: This post may or may not contain affiliate links.
SUBSCRIBE and never miss a thing!

This summer I went to a yard sale down the street and found this old wooden chair that was old and worn, and someone had chopped the legs off super short.  But somehow I feel in love with the weird little thing and brought it home to call my own.

First I scrubbed it clean with a scrub brush and hot water.  It sat on my front step for a few days looking kind of plain. That is when I decided to BE BOLD… and spray paint it (you can tell I live a pretty boring life when turquoise spray paint is me living on the edge).  I was a little worried as I did not know how it would turn out, and I did not want to ruin it… after all it was a pricey $3 investment :) .

 So singing the smurf jingle “la la, la la la la” I started to paint my chair a pretty shade of blue.  Starting with the bottom first to try and get my amazing spray painting skills perfected before I did the top where people could see my painting skills.

Since the chair was old and weathered it absorbed a lot of paint in the spots that the finish had been worn off.  But I loved the distressed look to I left it like that.

 After it dried I took a sanding block to it, and started to sand down the edged where it would naturally be worn.

I was starting to feel more “Martha Stewartish” with every passing second.  But still in the back on my mind wondering if this turquoise chair was going to turn out or not.

Next I tested a few different stains on the bottom of the chair (where no one will see them, unless they turn the chair upside down) it is a good thing I did because the first two stains I used did not look good at all.  One was way to black and the other was red and clashed with the blue. I was just using what we had in the garage left over from other projects.

I got lucky and found this Minwax stain the color was just what I was looking for.  I brushed it on, let it set a few minutes then I would rub it back off with a clean rag (use an old rag because it will ruin it).  The stain helped to restore that aged look, and show off the years of wear the chair had been thru.  But now it had a fancy new color as well…. It is kind of like when your Grandma gets false teeth, same adorable Granny but with a jazzy new smile :)

 Next I put on a vinyl letting that said Welcome, sprayed it with a clear coat and I was done.  It now sits happily on my front step with a plant on it, and I have to say I am glad I was feeling bold… because I LOVE the way it turned out!

Leave a Comment: 9 comments

Filed Under: DIY, Thrifty Craft Ideas

Tags: , , ,

Disclaimer: This post may or may not contain affiliate links.
SUBSCRIBE and never miss a thing!

patternsNewly launched, the Patterns section of Craftsy is the fastest growing online marketplace for crafting patterns. Because Craftsy does not charge designers any fees or commissions for listing or selling their patterns, creative indie designers are hurrying to the site to set up their pattern shops. There, well over half a million active Craftsy members browse the thousands upon thousands of patterns of all types, for all crafts. And since the designers aren’t getting charged or having to give Craftsy any commissions, the deals on patterns are amazing! Some are even free. It’s the perfect place to get inspiration and instructions at super low prices.

Check out the patterns

Leave a Comment: 0 comments

Filed Under: Free, Online deals, Thrifty Craft Ideas

Tags: , , ,

Disclaimer: This post may or may not contain affiliate links.
SUBSCRIBE and never miss a thing!

The other day while doing my Costco trip I ran into one of the demo ladies who just so happened to be sampling Jelly Belly jelly beans. You know you love the samples and when you come across a good one you get all excited, right?!  Maybe that’s just me??? :0 Anyway, she had made several bracelets and was giving them away to the littles who came up for a sample. We chatted a bit about what a great and cute idea this was. I just knew I had to make these for the little people in my life.

Yields approx. 10 bracelets

Supplies Needed:

  • 1 bag 9 oz. Jelly Belly jelly beans or regular jelly beans
  • clean/new household needle
  • clear stretch cord .5mm
  • scissors
  • 12 count sachets bags 3.75 inch high x 3.25 inch wide (for delivering your jelly bean bracelet gift) optional

Directions

Thread needle with stretch cord. Double knot the end of the stretch cord. Place the eye of the needle down onto a hard surface and gently thread desired colored jelly beans onto cord. Tie up bracelet by double knotting your two ends together. Place in sachet. Give to that special kiddo in your life.

Notes: One important thing I need to tell you about the needle. I used a household needle as they are skinny and didn’t damage the jelly bean. The thicker the needle the chances are the jelly bean will separate. I had to make the eye of the needle bigger by sticking the tip of a sharp knife through it and bending it very gently so that the stretchy cord could fit through it. We found the sachets bags in the cake decorating/wedding section of Walmart. I wanted something fast and easy, but yet pretty. You can also package these up professionally if you have a seal a meal at home. To do this, I purchase clear plastic bags in bulk at our local party store. The bracelets I made were for 3-5 year old wrists. We used approx. 12 inches of stretch cord and 20 jelly beans per bracelet.


Leave a Comment: 4 comments

Filed Under: Thrifty Craft Ideas

Tags: , ,

Disclaimer: This post may or may not contain affiliate links.
SUBSCRIBE and never miss a thing!